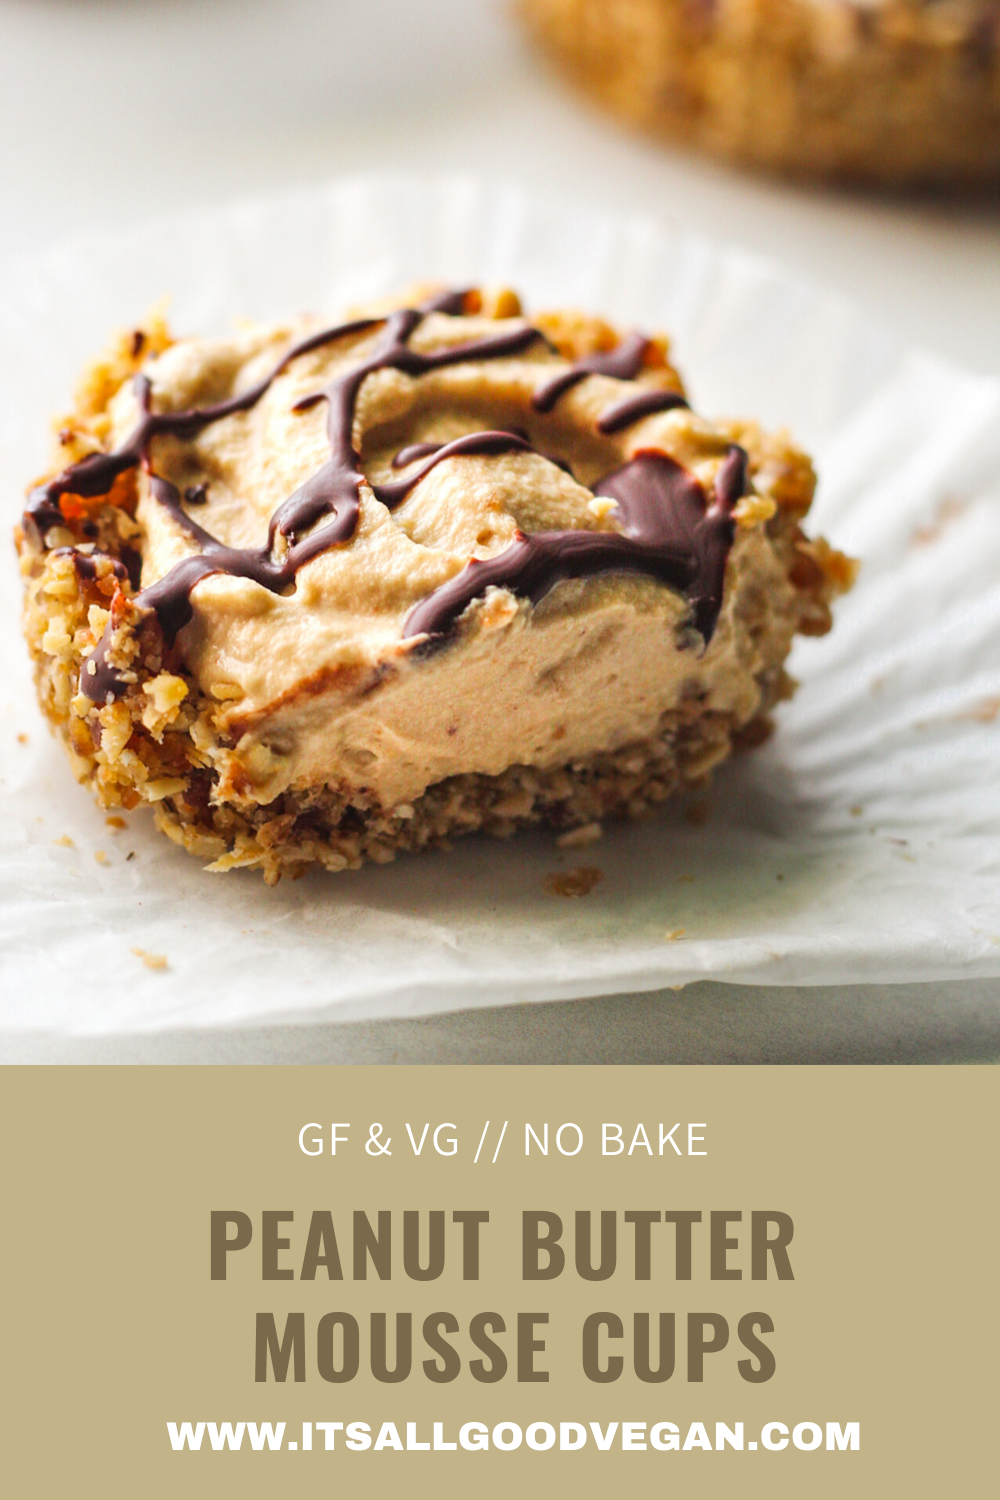
If you are a fan of chocolate and peanut butter you will love these No Bake Peanut Butter Mousse Cups. Made with a oat crust and filled with a creamy peanut butter mousse drizzled with melted dark chocolate. Make these ahead of time and pop them in your refrigerator or freezer until you’re ready to eat them.
These cups are filled with a fluffy yet creamy coconut peanut butter mousse. Then drizzled with delicious dark chocolate. Not only are they simple and easy to whip up but can be made gluten free by using certified gluten-free oats.
Before you make the no bake crust make sure that you soak your pitted dates before adding them to the food processor or blender. Dates seem to dry out very easily so soaking them in warm water just helps to ensure that they are sticky enough to form the crust. I also added 3 tablespoons of melted coconut oil to the crust. Though, if you noticed that the crust is too dry and find that it is hard to shape into cups add an additional tablespoon of coconut oil.
TIPS WHEN MAKING YOUR PEANUT BUTTER MOUSSE
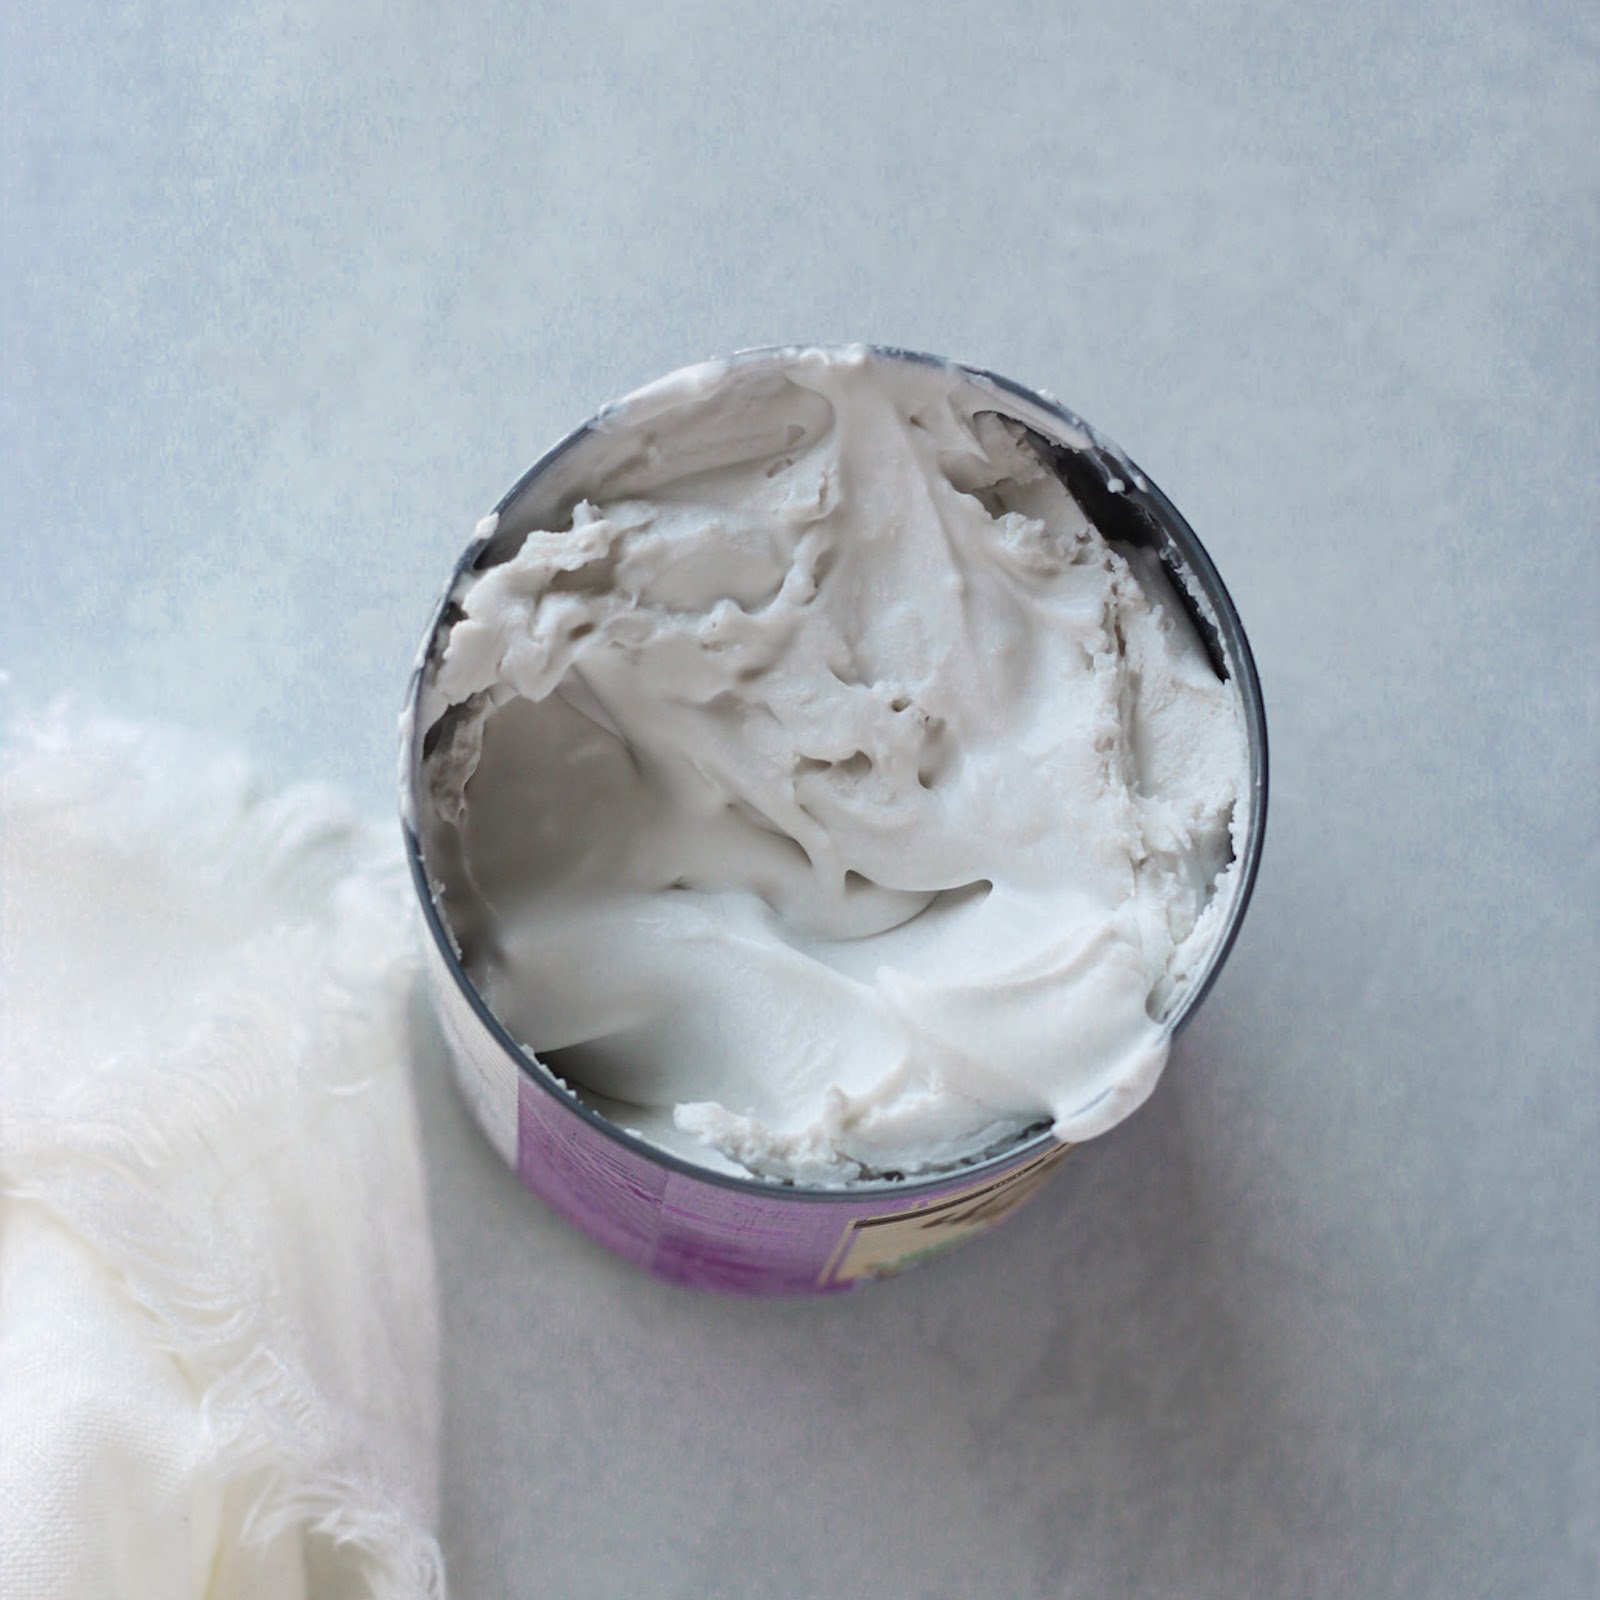
- I used coconut cream from the can. To ensure you get that creamy and fluffy texture you will want to chill the can of whipped coconut prior to making the mousse.
- If you don’t have canned coconut cream full fat coconut milk will work as well.
- Only scoop the thick part of the coconut cream sitting at the top of the can. Leave the coconut liquid (thin part) in the can.
- When scooping out the thick and fluffy part of the coconut cream from the can you might think, wow this is not that much. Don’t worry, when you whisk it you will notice it will double in size. Keep the extra coconut liquid at the bottom of the can and use it for smoothies.
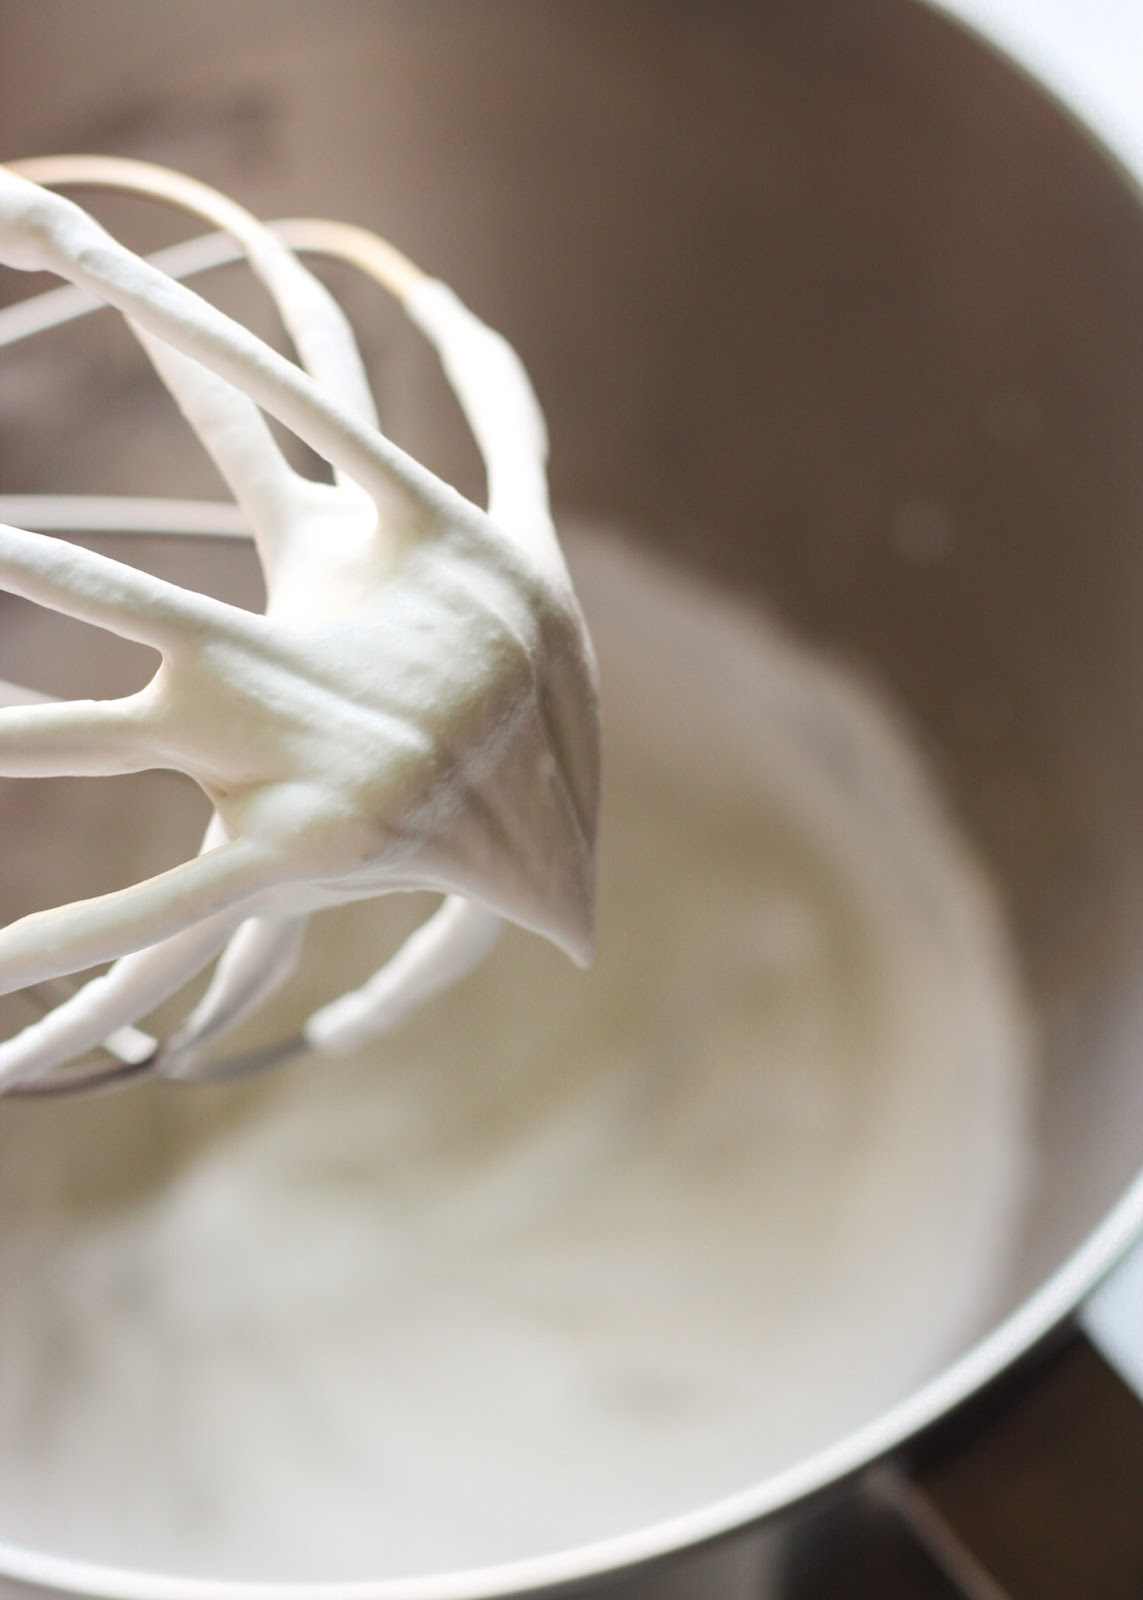
- After you have whipped your coconut cream into a thick and fluffy texture you will add the nut butter and powdered sugar. Adding the powdered sugar will really thicken it. To make the peanut butter mousse even thicker add more sugar. Or you can skip adding the sugar altogether. Just keep in mind the peanut butter mousse texture will be thinner if you don’t add the powdered sugar.
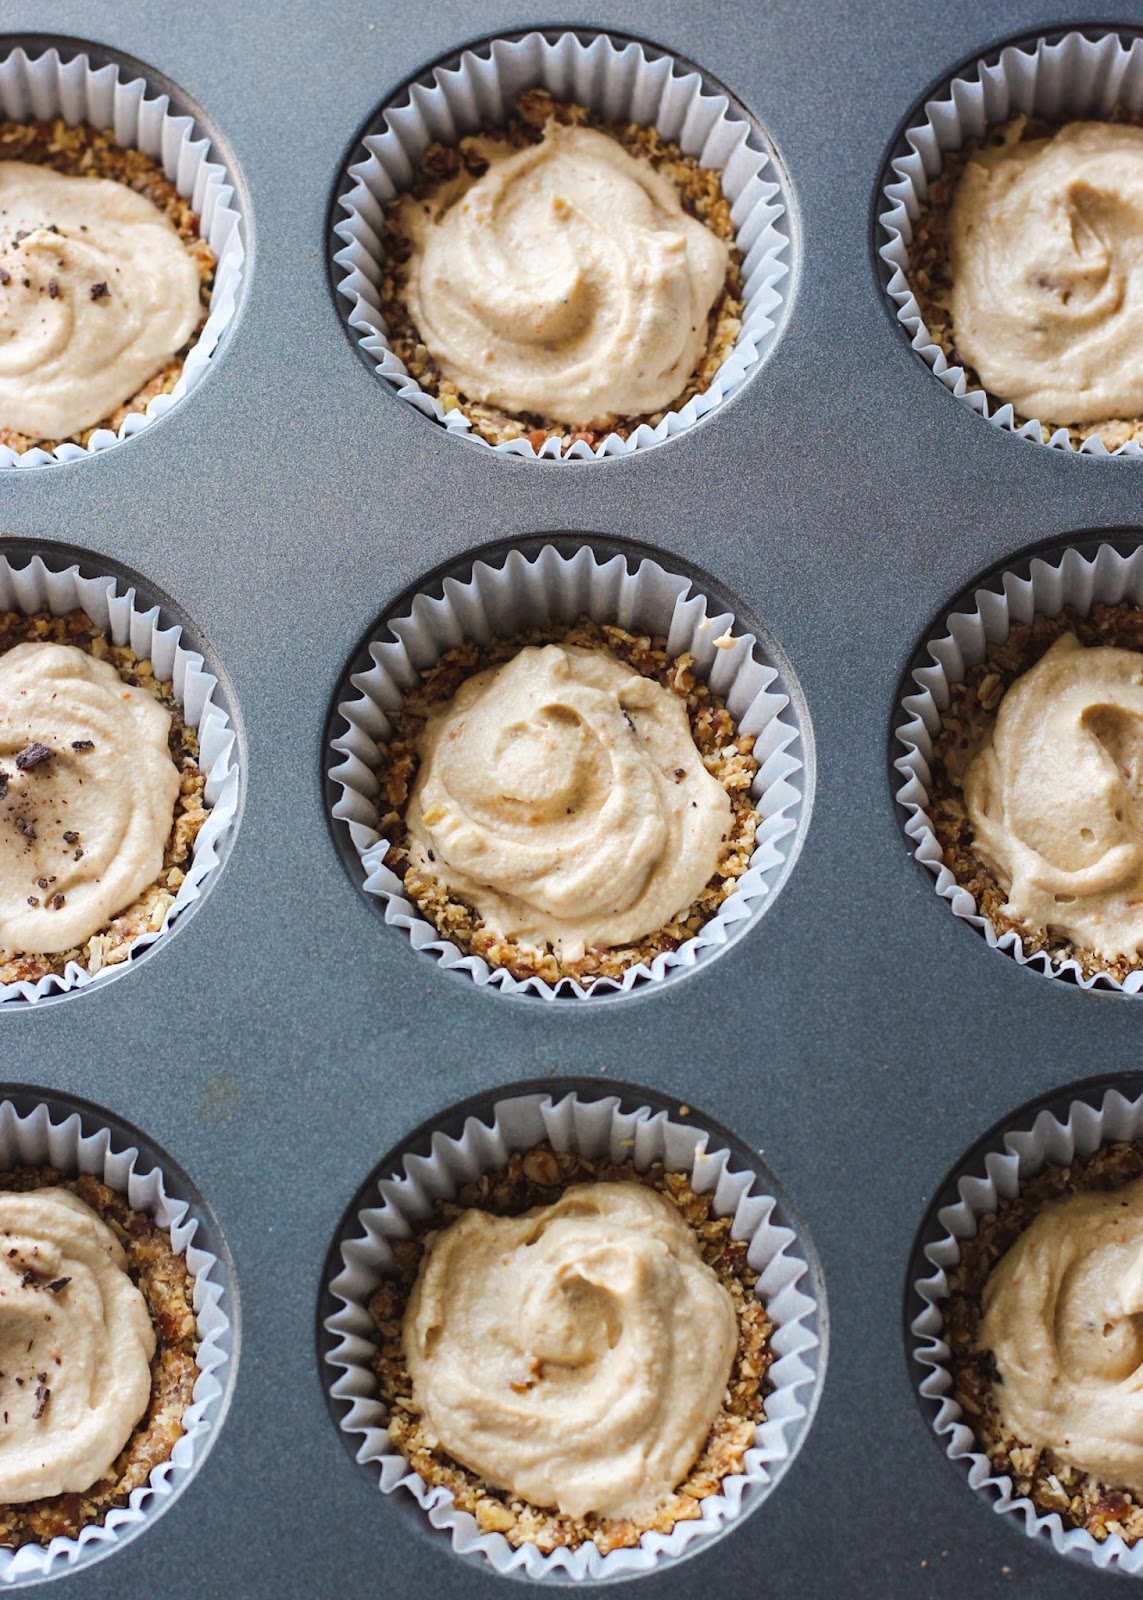
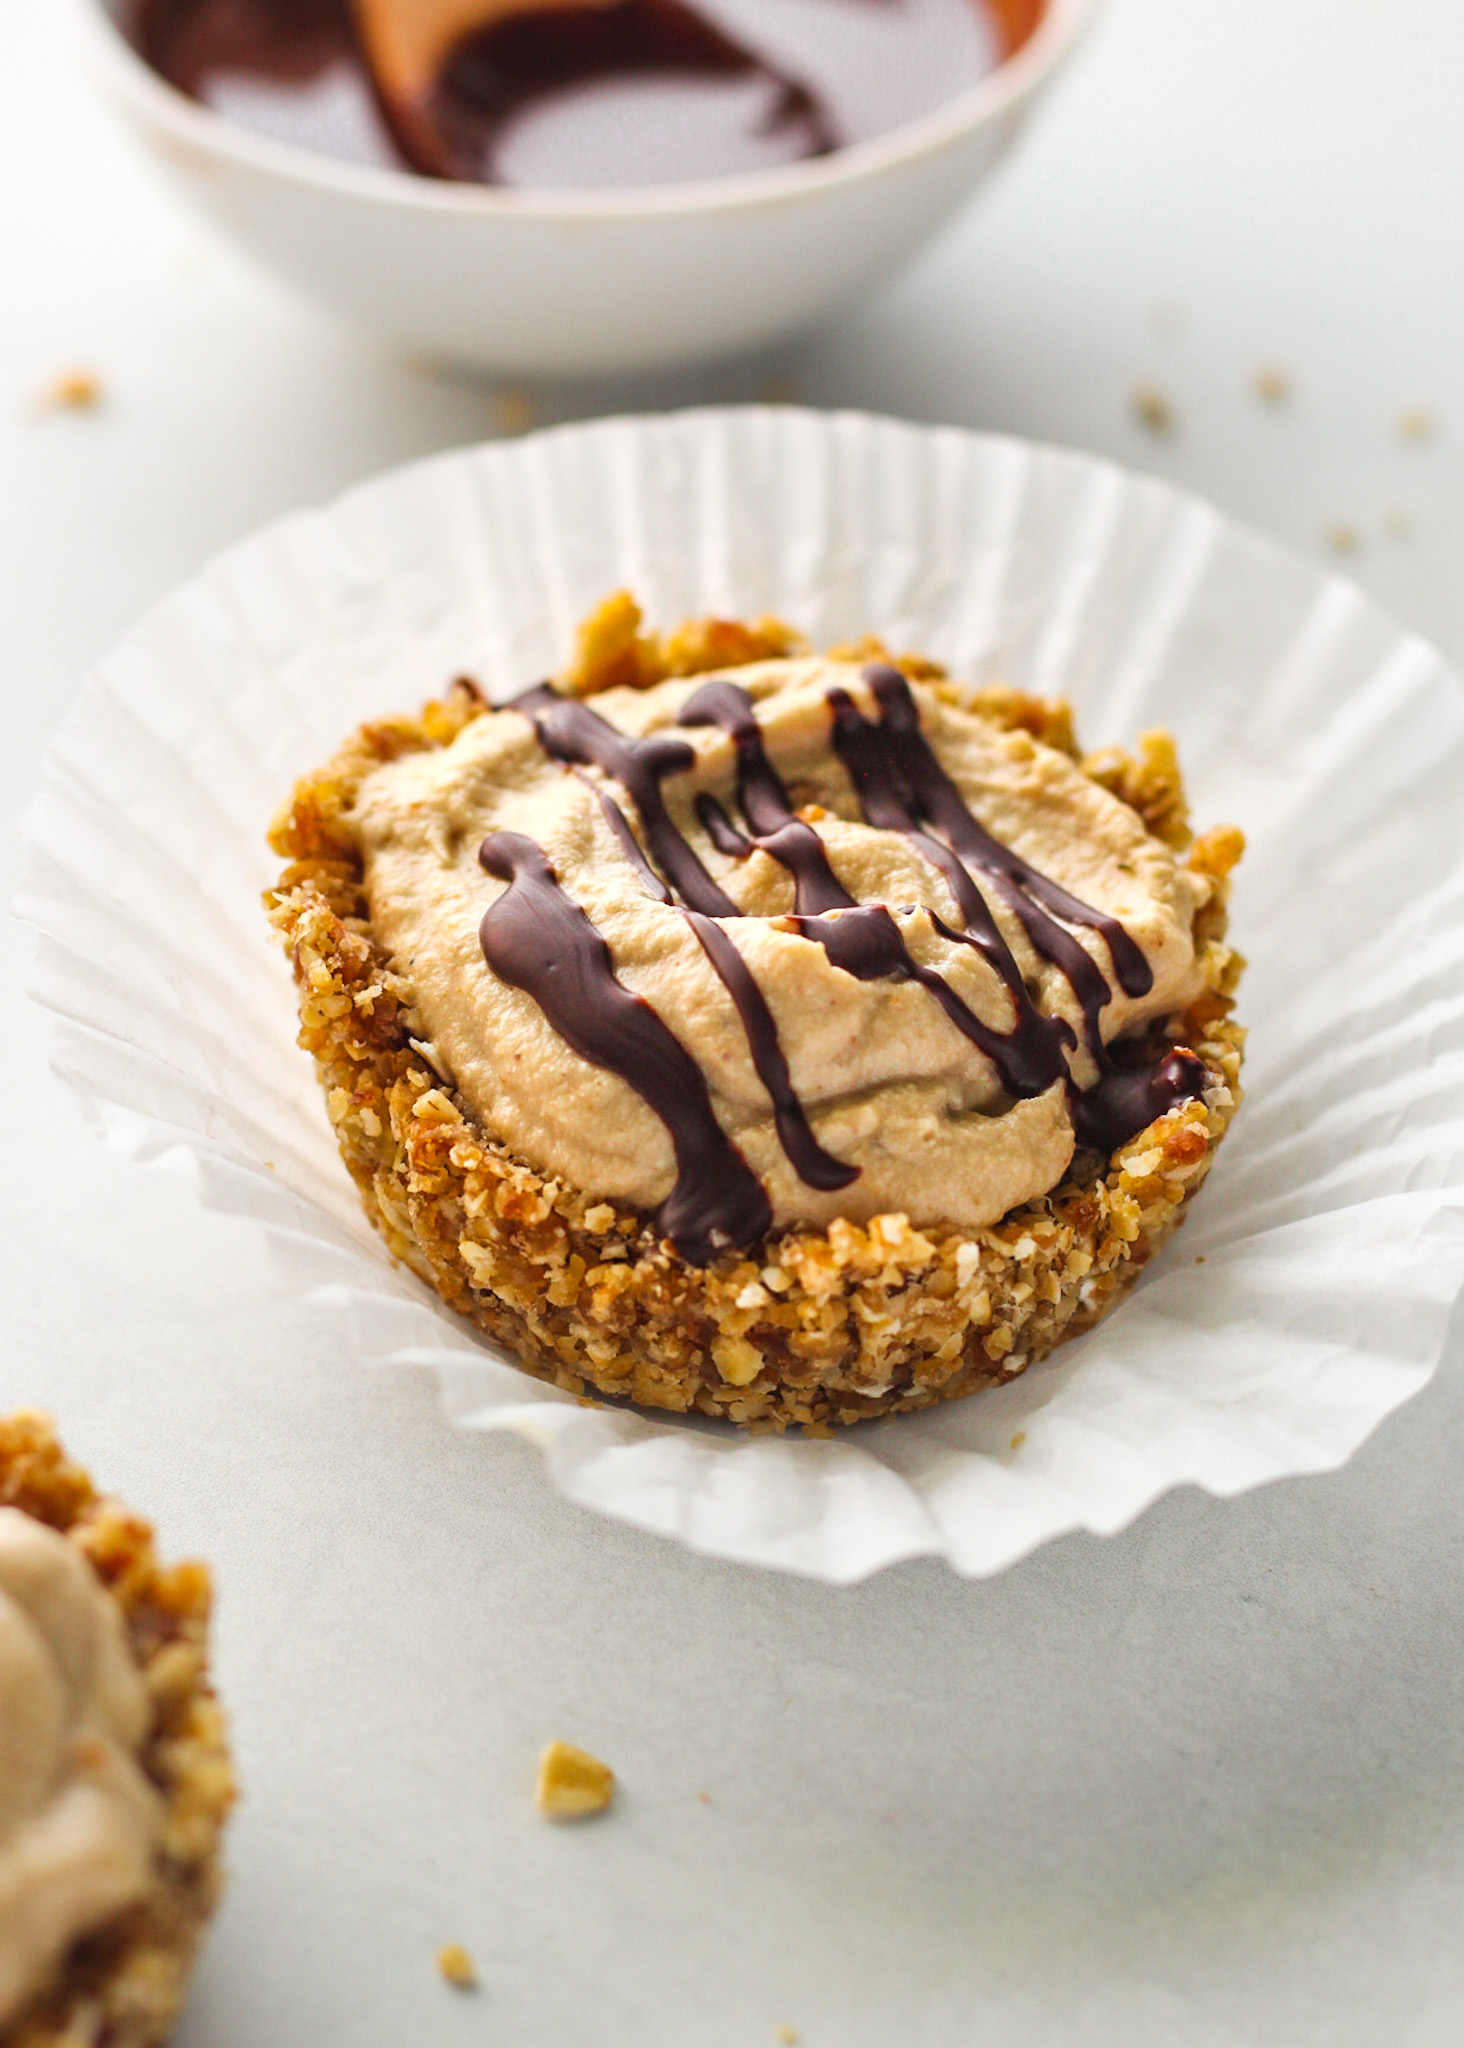
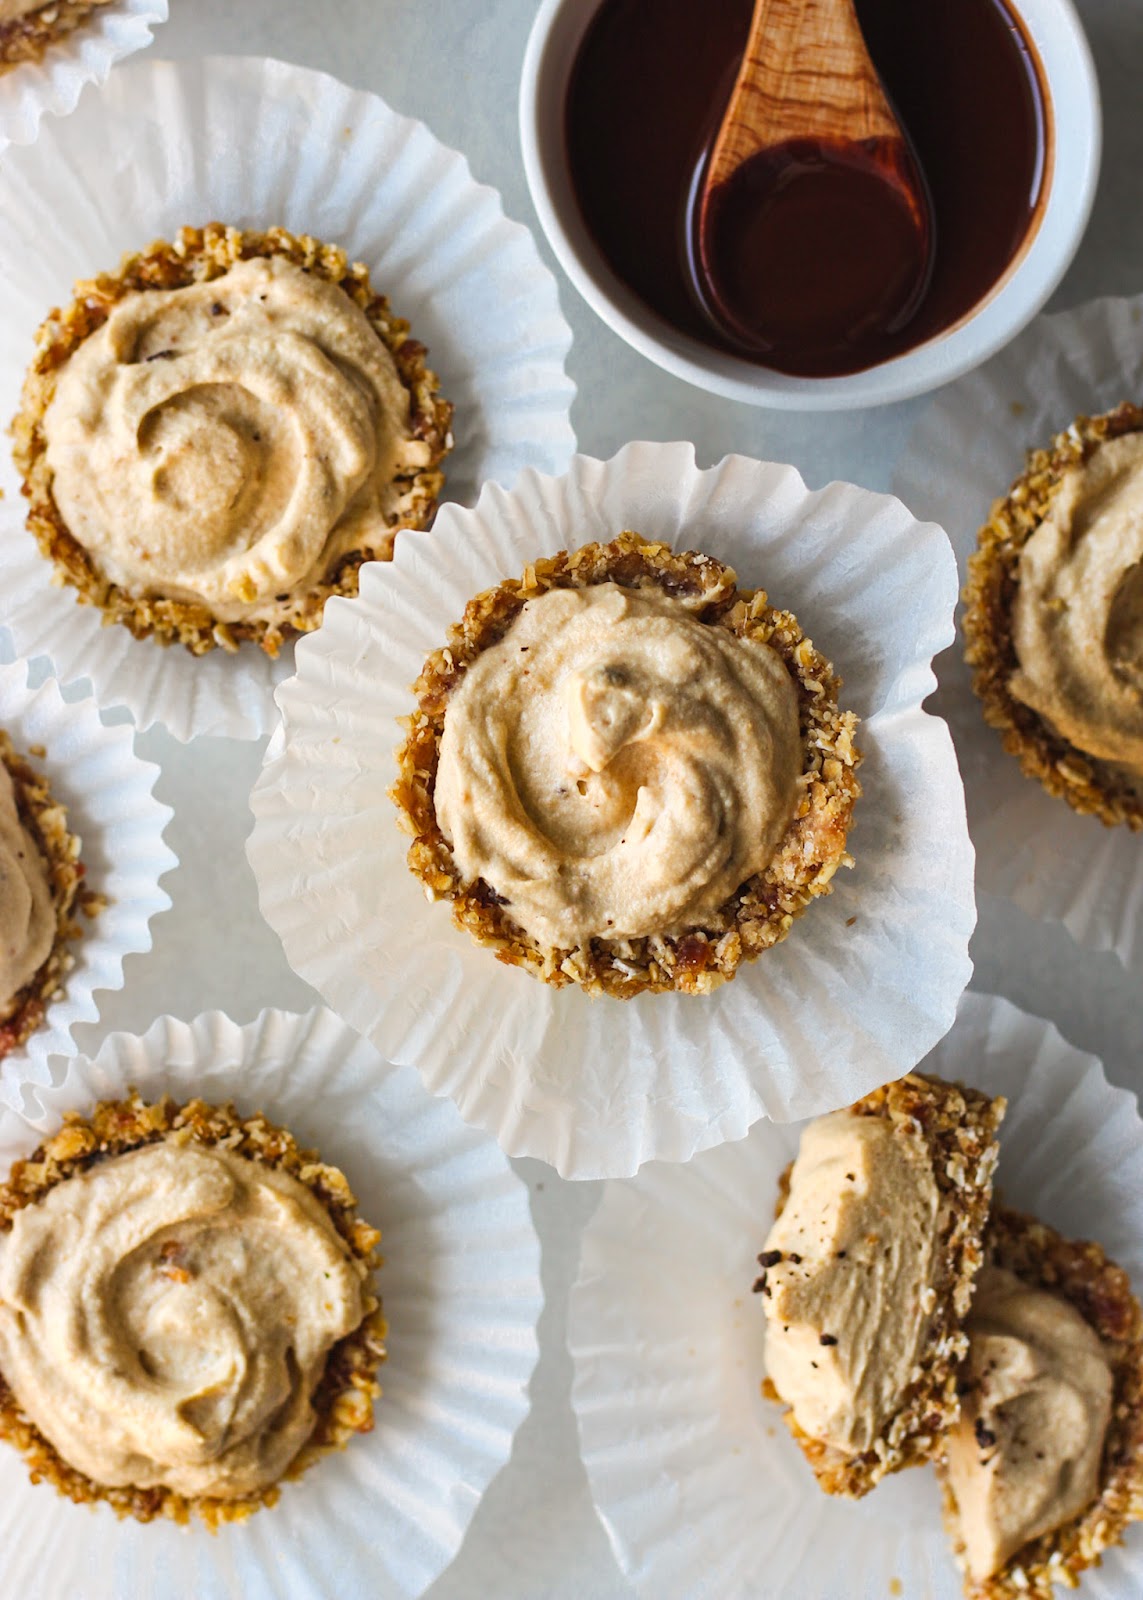
After you have made your peanut butter mousse you will add 1 tablespoon of the mixture in your no bake crust. I used a spoon to add a little swirl to the top of mousse, though that is optional. Lastly, top your cups with chopped dark chocolate or melted chocolate. Adding chocolate to the top is optional so if you do not have chocolate, no worries! They will taste delicious as is.
Before eating use your hands to peel the paper from the chocolate exposing the crust and peanut butter mousse. I HIGHLY recommend using the paper liners. By doing so it will make it super easy to remove the cups without the crust sticking to the cupcake pans.
Make these ahead of time and pop them in the refrigerator or freezer until you are ready to eat them. Just keep these Peanut Butter Mousse Cups in the paper cups to store. This ensures that their crust holds together well.
When you make these Peanut Butter Mousse CupsI would love it if you would snap a photo and share it with me on instagram @itsallgoodvegan.com. I can’t wait to see how you like them!
These Peanut Butter Mousse Cups are:
Creamy
No Bake
Fun to make
Naturally sweet
Vegan and gluten-free
No Bake Peanut Butter Mousse Cups
Make everyday a party with these dark Chocolate Popcorn Party Cups. Layered with delicate dark chocolate, creamy peanut butter, and salty popcorn.
No Bake Crust
- 12 paper muffin cups
- 1 ½ cups old fashioned oats, gluten free oats
- 1 cup pitted medjool dates, soaked in warm water
- 3-4 Tbsp coconut oil, melted
Peanut Butter Mousse
- 1 can (13.5 oz) chilled coconut cream, substitute for canned whole fat coconut milk.
- 3 Tbsp peanut butter, substitute with any type of nut butter
- 2 Tbsp powdered sugar
Chocolate Drizzle
- ¼ cup dark chocolate
- 1 tsp coconut oil
Directions
- Line your standard muffin tin with 12 paper cupcake liners.
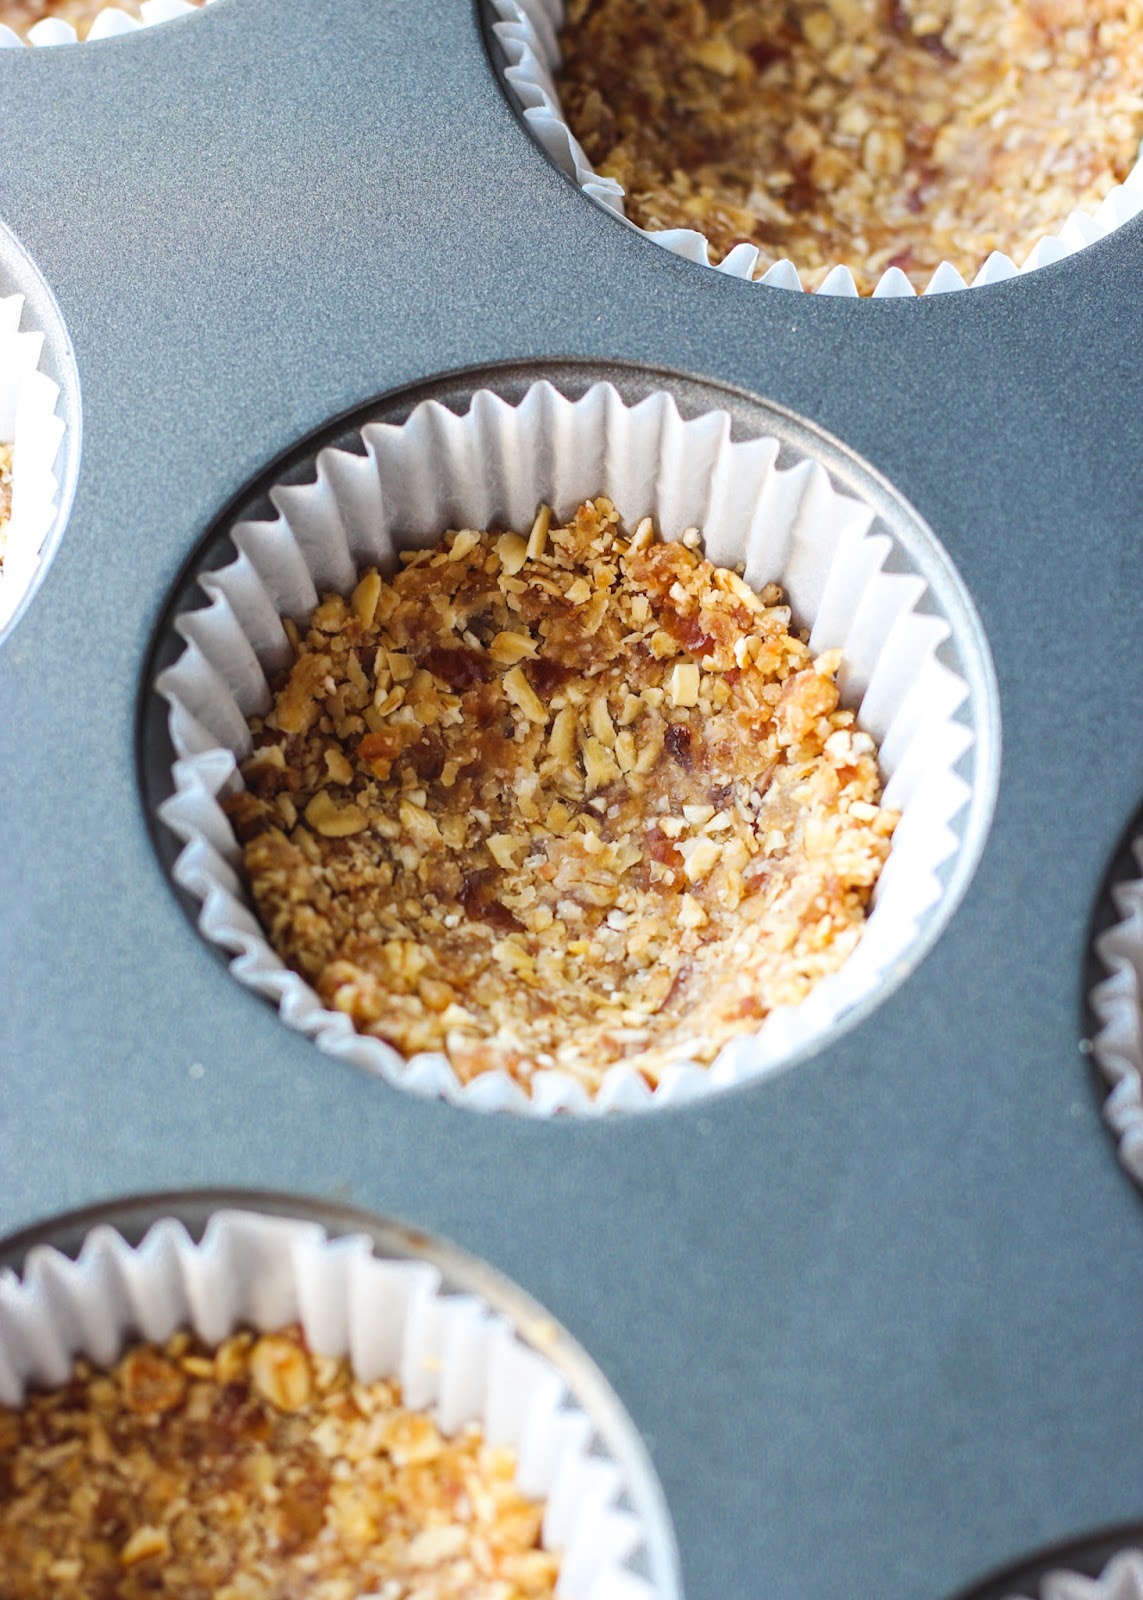
- Add the oats in a high powered blender or food processor and pulse 3-4 times. Combine the soaked dates and coconut oil. Pulse until it turns into a dough like texture. Add an additional tablespoon of coconut oil if the mixture is too dry.
- Add 2 tablespoons of the no bake crust mixture to each muffin tin. Using your hands form the crust. Pack the crust mixture down, forming the base and pushing the crust up slightly up around the edges (about half way up).
- Place the muffin tin in the freezer for 10 minutes or the refrigerator 15-20 for the crust to harden.
- Remove the thick coconut cream from the top of the chilled can using a spoon and place it in a large mixing bowl. Leave out the coconut liquid on the bottom of the can (around half of the can). You can save it for your next smoothie.
- Using an electric mixer, begin to whip the coconut cream on medium speed for about 2-3 minutes until it starts to get fluffy. Add the peanut butter and powdered sugar and mix for an additional 2-3 minutes.
- Add 1 tablespoon of the peanut butter mousse to the cups. Using a spoon form the top of the whip into a swirl. Place the muffin pan in the freezer to harden for 20 minutes or the refrigerator for 30 minutes.
- Combine the chocolate and coconut oil in a microwave-safe bowl. Microwave for 30 second intervals stirring between each one until the chocolate has melted.
- Take the cups out and drizzle with chocolate.
- Remove the Peanut Butter Mousse Cups from the liners and enjoy! ***Store the Peanut Butter Mousse Cups in the refrigerator or freezer. If left out for long periods of time they melt and fall apart.
- Make sure to soak your pitted dates before using them for the crust. If not the crust will not hold its shape well.
- If you are not vegan substitute chocolate for milk chocolate.
- Substitute the peanut butter with almond butter, sunflower butter or cashew butter.
- Don’t want to add powdered sugar to the whip? You can skip that step, just keep in mind the whip doesn’t firm up as well without the sugar..
Leave a Reply